Saturday 19 January 2013

A Tale of Two Mints!!

Perth Mint in Perth, Western Australia opened in 1899. Sir John Forrest (the first Premier of Western Australia) laid the foundation stone in 1896. The building was designed by George Temple Poole and the National Trust made it one of the first buildings to be entered on the State's heritage register.

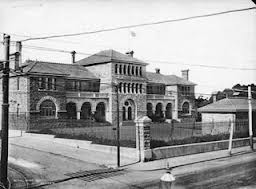
The reason why it was built was due to the discovery of rich gold deposits in Coolgardie and Kalgoorlie. It was the third branch of Britain's Royal Mint - the others being the Sydney Mint and the Melbourne Mint.

People came from around Australia and the world in large numbers with their raw deposits of gold which was then melted and turned into gold coins. The Mint stopped making gold sovereigns when Britain abandoned the gold standard in 1931.  Nevertheless, the refinery remained busy as staff turned their skills to making fine gold bullion bars.  


In 1940, with Australia on a war footing, an urgent telegram arrived from the Commonwealth Treasury in Canberra: "Heavy demand for Australian coin and Melbourne Mint working full capacity.  Could you undertake minting copper coin?"
Hundreds of millions of Australian pennies and half pennies were produced by The Perth Mint between 1940 and 1964.  The Mint also fulfilled an order for 1.3 million shillings in 1946.  Its considerable output was boosted further when Australia introduced decimal currency in 1966.  It had produced a staggering 829 million 2 cent coins and 26 million
1 cent coins by 1973.

The Perth Mint remained under Britain's jurisdiction until 1 July 1970, when ownership transferred to the State Government of Western Australia.  


The Perth Mint is open 7 days a week and they do guided tours for a fee. On this tour you can see historic Perth mint coins, the worlds largest gold bar collection, gold being poured and Australia's largest nugget collection.  There is gift shop where you can buy coins, jewellery and souvenirs.  Definitely worth a visit.

The other mint was a recipe of mine which I know you will enjoy!

                                                   
                                                           Chocolate Mint Slice

Ingredients

Base 
One and a half cups self raising flour 
2 tbsp cocoa 
1 cup coconut 
Half a cup brown sugar 
125g unsalted butter, melted
 
Filling 
30g copha, melted
2 cups icing sugar 
2 tbsp milk 
Half teaspoon of peppermint essence
 
Chocolate layer
125g dark chocolate
 30g unsalted butter


Method
 
Preheat oven to 180°C. Butter a 16cm x 26cm x 3cm slice tray and line with baking paper.

Combine flour, cocoa, coconut and brown sugar in a bowl, stir in melted butter and mix until well combined. Press mixture into slice tray and bake for 10-15 minutes until slightly brown. Remove from oven and cool slightly.

To make filling, place icing sugar in a small bowl, stir in melted copha, milk and peppermint essence. Spread filling over warm base. Place tray in fridge for about 30 minutes until filling is cold.

To make the topping, melt butter and chocolate together, stir until smooth. Spread chocolate over peppermint filling.

Leave at room temperature to set and then slice into squares. I usually slice through the chocolate layer first, then go back and cut right through the base.


Saturday 12 January 2013

A Treat For Royalty

Iolani Palace in Honolulu is one of the most beautiful historical old buildings I have seen. I still have my admission tickets.

King David Kalakaua, the last King of Hawaii, built the new palace in 1882 after demolishing the old palace in 1874.

Influenced by European architectural styles, this royal residence included Hawaii’s first electric light system, flush toilets and intra-house telephones. The rich interior features a beautiful koa wood staircase, portraits of Hawaiian royalty, furniture and royal gifts and ornaments from around the world.  It also has an American Florentine-style throne room, reception and dining room.

You can view the private living quarters of the royal family. On the basement level, view the ancient regalia of Hawaiian royalty, from swords and precious jewelry to the two golden crowns of the King and Queen. On the spacious grounds of the palace, see the Iolani Coronation Pavilion, where in 1883, Kalakaua was crowned king.

Queen Liliuokalani, the kings sister and successor, was deposed and the Hawaiian monarchy overthrown in January 1893. A provisional U.S. government was established. The Hawaiian Islands were eventually annexed as a United States Territory in 1898. Hawaii became the 50th state in 1959 and during this time Iolani Palace was used as the capitol building until 1968.
 
Government officials carefully inventoried its contents and sold at public auction whatever furniture, or furnishings, were not suitable for government operations.

Government offices vacated the Palace in 1969 and moved to a newly constructed capitol building on land adjacent to the Palace grounds. 

Restoration of the Palace began in earnest.

In preparation for restoration, the Junior League of Honolulu funded and staffed an extensive historical research project. Researchers uncovered clues about construction, furnishings, and palace lifestyle from nineteenth-century newspapers, photographs and manuscripts found in various archives and libraries.
Overseeing the restoration was  The Friends of Iolani Palace, founded by Mrs. Liliuokalani Kawananakoa Morris, grandniece of Queen Kapiolani. This organization continues to manage Iolani Palace as an historic house museum and to share the history of the Hawaiian monarchy.

Many original Palace objects sold and dispersed at public auction have been recovered from different parts of the world – glassware found in Australia, and a table in the Governor’s mansion in Iowa to a chair in a local thrift store. The quest to find original Palace furnishings and artifacts continues. Many original furnishings are still missing. 


Pineapples in Hawaii are very popular. Here is one of my recipes that would make any Royal happy!!!


Pineapple Upside-down Cake

Ingredients
  
440g can pineapple slices in juice
One third of a cup brown sugar 
90g butter, softened 
Half a cup caster sugar 
2 eggs, lightly beaten 
One and a quarter cups self-raising flour, sifted

Method 
  
Preheat oven to 180°C. Grease a round ring baking tin. Line base with baking paper.

Drain pineapple, reserving 2 tablespoons juice. Cut pineapple in half. 

Sprinkle brown sugar over lined base of baking tin.  Arrange pineapple on top of brown sugar.

Using an electric mixer, beat butter and caster sugar for 3 minutes or until light and fluffy. Add eggs, one at a time, beating after each addition.

Stir in flour and reserved pineapple juice until well combined. Spread mixture over pineapple. Bake for 35 to 40 minutes or until a skewer inserted in the cake comes out clean. 

Stand in pan for 5 minutes. Turn out onto a wire rack to cool.

Serve with fresh whipped cream. Yummy!


Friday 4 January 2013

The Dingo and A Scone!

Western Australia has different sorts of land marks. One that stands out is in North Fremantle. It is the Dingo Flour Mill, on Stirling Hwy facing the Indian Ocean. The main reason it stands out is the large red dingo painted on the building.

The mill was designed by architect J.F. Allen, of Allen and Nicholas, and the office building was designed by Powell, Cameron & Chisholm Architects.

Known as the Great Southern Roller Flour Mills Limited which dates from 1922.
On the property are silos, an office, laboratory and other buildings. In January 1976, the company was taken over by Allied Mills Limited, an Eastern States Company, which became Goodman Fielder Wattie Ltd after a subsequent merger.

The dingo logo was painted by artist Les Nash in 1940 for £40. It is about four storeys high. Rumor has it during WW2 it was painted over so it wasn't a war target. In 2010 the flour mill was renovated, and the dingo now gets re-painted every month.

The flour, came in cream coloured calico bags with the red dingo logo. Maybe you still have a bag in your cupboard!

To do the mill justice, here is one of my favourite recipes.

Pumpkin Scones

Ingredients  
1 tablespoon butter or margarine 
Half a teaspoon of mixed spice 
1 egg 
1 cup cold, mashed, cooked pumpkin
2 cups self-raising flour 
Half a cup of sugar

Method 

Preheat oven to 225°C.

In a bowl, combine butter and sugar with electric beater. When butter mixture light in colour add egg, spice and pumpkin and beat until well combined.

Then, with a spoon,  gently stir through the flour. Once mixture formed place onto a bench. 

Combine with your hands and flatten the dough out until you get to 1 inch thickness - add more flour if needed.

Flour the rim of a cup or round cutter to cut each scone out.

Place on greased tray with 1cm space around each scone and bake for 10-20 minutes, depending on the size of your scone. 

When cooked, they should be brown on top.

Serve with butter and jam,  jam and cream or just plain.

This recipe makes about 12 large or 24 small scones......Enjoy!